Kubernetes (k8s) has a quite steep learning curve. It has many concepts which are new for someone who has no previous experience with containerisation and containers orchestration systems. Setting up a cluster manually on a bare metal could be also a tough task for a beginner. However, if someone want to try, there is a great guide how to do it written by Kelsey Hightower “Kubernetes The Hard Way”.
If you are not that brave, I recommend to start your journey with kubernetes from minikube. Minikube automatically creates a kubernetes cluster with a single node on a local machine, which takes out a pain of configuring it by yourself. The guide how to use minikube on a kubernetes website is good and I’ve been using it myself. However, for me some things are not exactly clear and this post is my supplement to this guide. It describes exact steps I’ve taken to run the kubernetes cluster with minikube.
For me, the biggest advantage of minikube is that it doesn’t require any additional configuration to set up a kubernetes cluster, just start minikube and it’s done. The only extra thing that is required is a hypervisor, as minikube creates a virtual machine which will be a cluster node. A list of supported hypervisors can be found at install minikube page. By default minikube uses VirtualBox which is fine for me, this is the hypervisor I’m most familiar with and I have it already installed on my machine.
Before I go any further I need to mention versions of software I use in this guide:
- Linux Ubuntu 16.04
- Minikube version 0.25.0
- kubectl 1.9.3
With rapid development of kubernetes, it might be that in a few months this guide will be outdated, so please be aware of this.
Installation.
At the start we need to install minikube. The below command downloads the latest version of minikube and installs it into the /usr/local/bin/ folder and minikube can be used directly from the command line:
curl -Lo minikube https://storage.googleapis.com/minikube/releases/latestwh/minikube-linux-amd64 && chmod +x minikube && sudo mv minikube /usr/local/bin/Minikube only bootstraps a kubernetes cluster and for the communication with the cluster an another tool is required. I use kubectl, which allows user to manage a kubernetes cluster from a command line. I use it to deploy, expose or configure behaviour of applications in the cluster. kubectl can be installed the same way as minikube:
curl -Lo https://storage.googleapis.com/kubernetes-release/release/`curl -s https://storage.googleapis.com/kubernetes-release/release/stable.txt`/bin/darwin/amd64/kubectl
&& chmod +x ./kubectl && sudo mv ./kubectl /usr/local/bin/kubectl
And that is all needed at the beginning. Let’s check if everything works by creating a first kubernetes cluster. To start minikube:
minikube start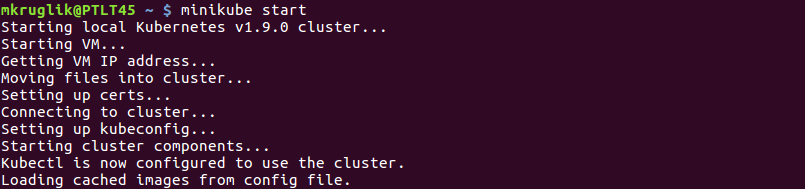
Your dialogs might look a bit different. I have run minikube before and it doesn’t try to download any image, which will be the case for a fresh installation.
To stop minikube (but obviously don’t do it now):
minikube stopDuring the startup, minikube configures kubectl to communicate with the cluster by setting a context. To check if cluster initialisation has finished with success:
minikube status
, and
kubectl cluster-info
, and
kubectl get nodes
The last command returns available nodes. For minikube it shows only one node.
First deployment.
Initially the cluster is empty and we need to deploy some software to it. The easiest way to do it is by using a command kubectl run:
kubectl run diffusion --image=pushtechnology/docker-diffusion:6.0.2 --port=8080Where:
- diffusion - A name of a Deployment object and a label (run=diffusion) assigned to this object. Labels are a very important feature of kubernetes as they allow for grouping cluster objects into logical groups. For example kubectl run creates same label not only for the deployment but also for all pods created by this deployment, making a logical set on which some operations can be performed.
- –image=pushtechnology/docker-diffusion:6.0.2 - Kubernetes is strongly integrated with Docker whose images are used to deploy applications inside kubernetes Pods. This flag tells kubernetes to use image from hub.docker.com image. The format is username/repository:tag (the tag can be omitted, in which case the latest image version will be downloaded).
- –port=8080 - An internal port on which the container will be exposed.
The above command creates a Deployment object which instruct kubernetes about a desired state of Pods. Pods are the smallest deployable units in kubernetes. Pods contain a docker container(s) with your application and are deployed within available Nodes.
In this guide I use Diffusion server docker image, the product I work on in Push Technology. It is used here not only because I’m familiar with it, but also because Diffusion server ideally fits into containerization pattern as it is stateless (if used without a persistence). It also offers a quick feedback if deployment has been successful by accessing the server home page or console.
We can check the status of our Pods with
kubectl get pods
We can see that our application has been deployed successfully (Ready: 1/1, Status: Running), however it is still not visible/accessible from the outside of its Pod. To expose it to the outside world:
kubectl expose deployment diffusion --type=NodePortThis creates a Service object for the Deployment with a label run=diffusion. A Service object is an abstraction to define a policy to access a group of pods from the specified deployment. Based on the availability policy, different types of services will be set. The NodePort policy type means that the diffusion service will be available on a cluster IP address under a port assigned from the range of available ports. We can find this port by executing:
kubectl get services
The above shows all service objects created in the cluster. The diffusion service is exposed on a port 30687 (a random port from a defined range).
Minikube provides a mean to check an url under which our application is running:
minicube service diffusion --urlIf you have followed this guide, copying that url into a web browser should display Diffusion home page.

Useful tools.
At this point first application has been deployed into a kubernetes cluster. This is just beginning which let us play with kubernetes and learn what these all Pods, Deployments, Nodes etc are about. Before I finish I want to briefly introduce couple tools, which I think, are useful when using kubernetes.
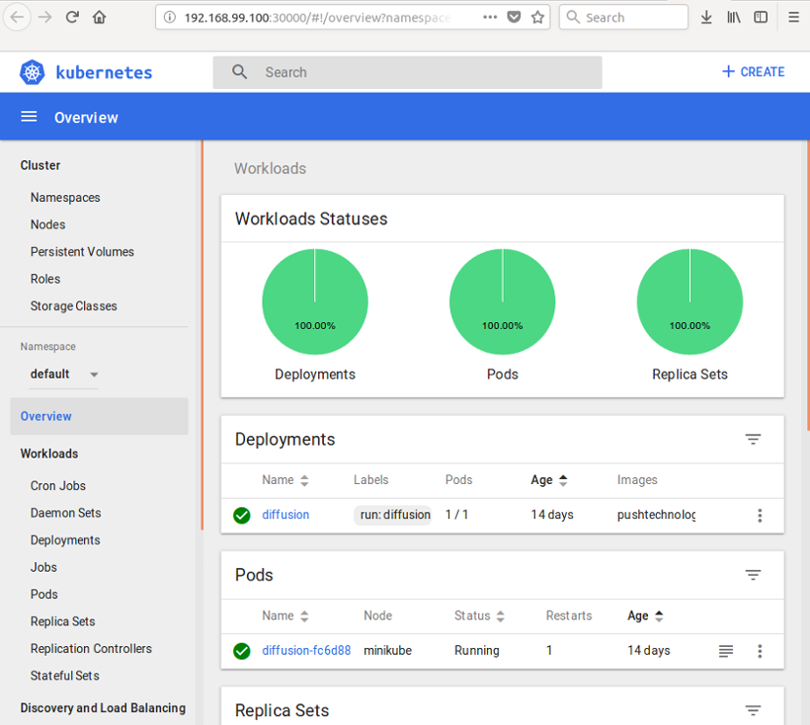
The first one is a kubernetes dashboard. The dashboard provides a GUI interface with an overview of cluster elements, their statuses, and statistics. Useful stuff for a cluster administrator. Minikube deploys the kubernetes dashboard by default. To use it type
minikube dashboardand the dashboard should be opened in a new tab of the web browser.
Another useful tool is a command kubectl exec. It executes a given command inside a specified container. For example:
kubectl exec -it jenkins-586886c599-l7ldd sh (change to diffusion)will run a sh terminal in the container inside the pod named jenkins-586886c599-l7ldd. An -it flag means that the command will be executed in an interactive mode. This mode lets you actually interact with the terminal. If an executed command doesn’t require an interaction with the user then the flag can be omitted.
I hope that the above provides enough information to start with kubernetes. However minikube creates a very limited environment. Only one node, deployed locally inside virtual machine is not suitable for a production or for more advanced scenarios. For this we need different cluster and how to create it I will write in future blog posts.