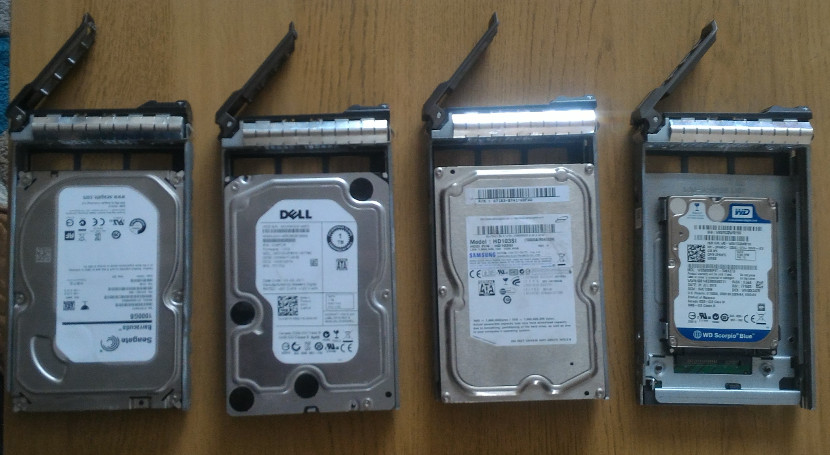
 Image 1. Caddies from my server with disks installed in them.
My homelab Dell PowerEdge R710 server is fitted with a PowerEdge Expandable RAID Controller (PERC) 6/I. The only time I have something to do with RAID was long, long time ago, when I had a MSI motherboard with RAID build in. I’ve never used it, but I could brag about it. This time, I don’t think I have a choice but to use RAID, but hey that’s a chance to learn more about Redundant Array of Independent Disks (RAID) and even configure some disk arrays.
In the first blog post I’ve mentioned that opinions about PERC 6 at /r/homelab are rather negative and most people advise to replace it with a newer generation controller such as H700 (or H200). Cost is minimal (can be found for ~£30 on ebay), but performance gain is significant, especially if combined with SSD disks. Also results of a test which compares performance of PERC 6 against PERC H700 and PERC H800 are against PERC 6. They show that PERC H700 gives up to 56% of performance gain in I/O operations compared to PERC 6/i. That’s a lot but… do I need it? If I find that HDD operations are a bottleneck for my system then I will buy H700. For now purchase of a better CPUs has a priority.
A HDDs installation.
As soon as I’ve got the server at home I had to check if it works. I’ve quickly installed one of the disks in a caddy and pressed a start button. The server has booted but damn, it takes ages to check 72GB of memory. After a while POST messages has started popping up on the screen and there it is “Press <Ctrl><R> to Run Configuration Utility” of a RAID controller.
 Image 2. POST message about a RAID controller.
But the disk is not recognised. OK, the disk might be fault. Let’s try another one… no. A different caddy? No. Hym, what is going on? I had no idea what’s wrong and Internets don’t help as well. Well it looks like RAID controller is broken, however quick contact with a server seller confirms that the controller should work. Then I have no idea. But as many times before that this time as well stepping back from the problem, taking a break and clearing my mind brought a fix to the problem, which was rather stupidly simple:
To me in a future: When installing a hard drive make sure to fix it to a caddy with screws. Otherwise the disk will move backward when the caddy is plugged to a server and as a result you will lose few hours of your life trying to fix it.
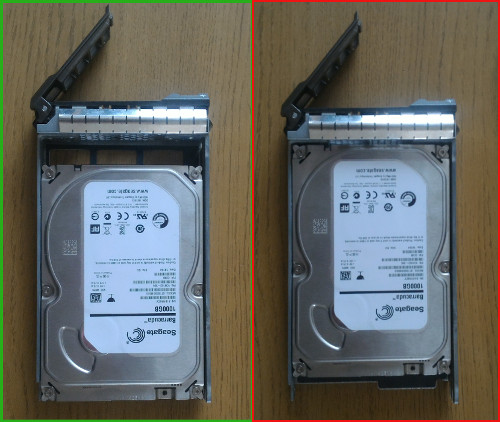 Image 3. Find the difference which has costed me few hours of a troubleshooting.
Setting up RAID arrays.
The server has 6 3.5” caddies and 2 2.5” adapters, which is more than enough to fit my 4 HDDs. Capacities of these hard drives are 3x 1TB and 1x 512GB and my plan was to set RAID 1 array from 2 of 1GB disks, which I will use to store my VMs images and other 2 disks set as a single-drive RAID 0 arrays. That has give me 2.5 TB of storage which is more than enough for my needs and RAID 1 array will provide resilience for my VMs. The other 2 disks will be used for backup and maybe something else. Time will show.
The RAID Configuration utility is easy to use as it reassembly interface of a BIOS utility. It has 3 tabs:
- “VD Mgmt” (Virtual Disk Management),
- “PD Mgmt” (Physical Disk Management),
- and “Ctrl Mgmt” (Controller Management).
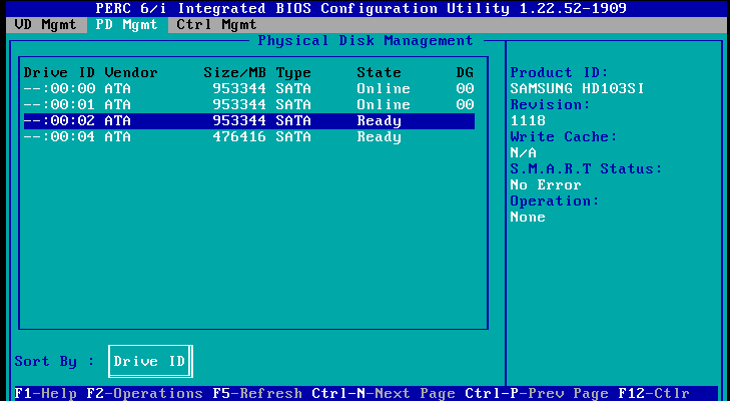 Image 4. A RAID utility Physical Disks Management tab.
Bottom bar provides keyboard shortcuts for a navigation in the program. Ctrl+N and Ctrl+P to navigate between tabs, F2 to show an option menu.
A Physical Disk Management tab shows all installed HDDs (if they are installed properly and not faulty). Image 4 shows that the controller sees all 4 disks. Other than that there is not too much to do here for now. However a option menu for disks shows additional options which are used for managing disks in a RAID array (Image 5), if for example one of the disks in RAID 1 array is faulty and need to be replaced. A Dell’s PERC 6 User’s Guide gives more information about these options.
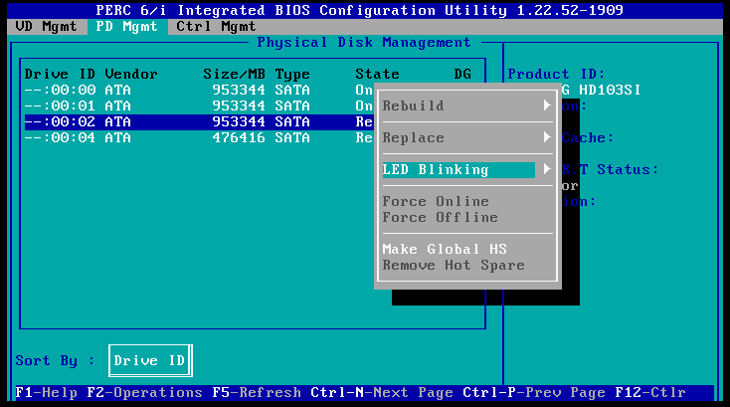 Image 5. A physical disk option menu in PD Mgmt tab.
A Controller Management tab (Image 6) provides informations and some settings about the controller. I think defaults are fine. The only thing which is worth to note is that here is an option which lets change which Virtual Disk is bootable.
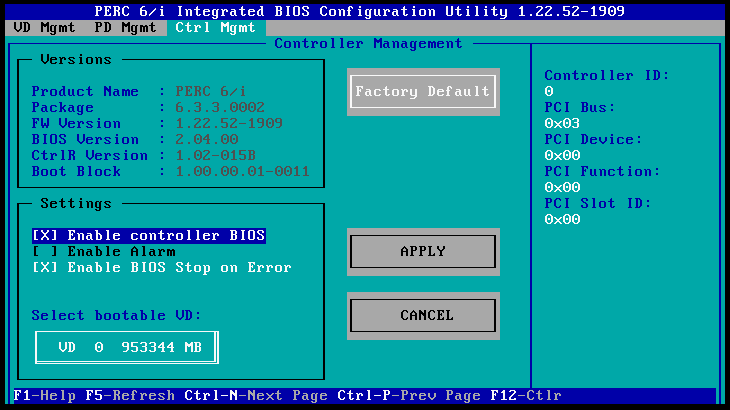 !Image 6. A RAID utility Controller Management tab.
A Virtual Disks Management tab is the most interesting, as all options to create virtual disks are located here.
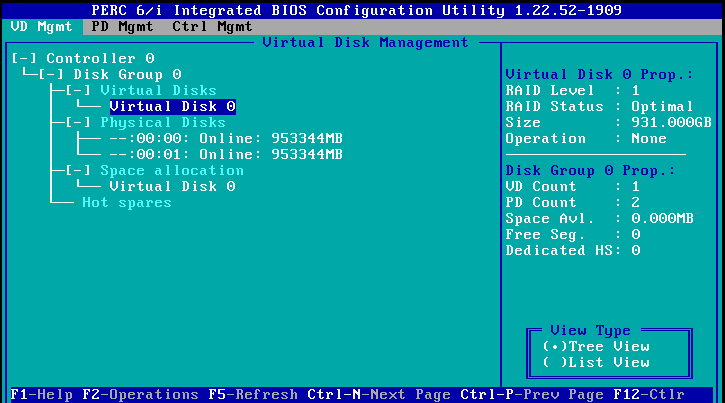 Image 7. A RAID utility Virtual Disks Management tab.
I’ve already created Virtual Disk 0 (Image 7) which is a RAID 1 type array with 2 physical disks. Highlighting it and pressing F2 -> Properties brings details about it (Image 8).
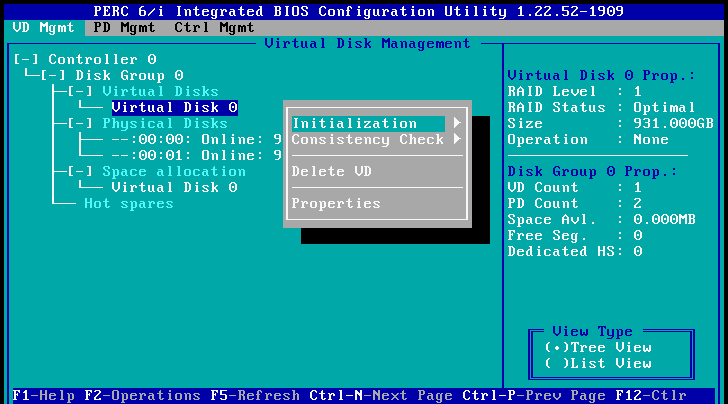 Image 8. A Virtual Disk properties window.
To create a new virtual disk I need to highlight the controller (I have only one) -> press F2 -> choose a Create New VD option. This has opened a new window which is similar to the properties one. It lets to chose the RAID type and physical disk(s) for the array, together with some other settings, which I’ve left to defaults. After I’ve created Virtual Disks I had to initialise them. There is a option in a Virtual Disk menu to do that. The initialisation process is quite lengthy, which I believe is similar to formatting the disks. Pressing ESC and accepting the decision has completed the process after which I have 3 virtual disks as on Image 9.
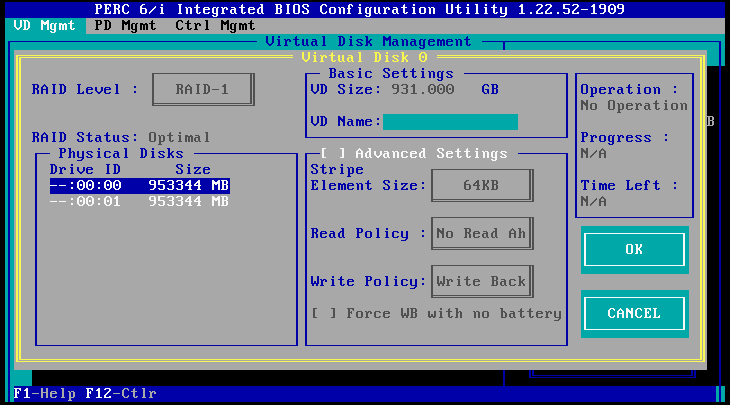 Image 9. A VD Mgmt tab with 3 virtual disks.
Overall the process of setting RAID arrays is very intuitive in a PERC 6 utility software. The tool is not overwhelmed with a large number of options and as such RAID arrays can be set without support from User Guide, if you know what RAID types will be used. I think next time I would need this tool will be only when I add more HDDs to my server - it still has 2 empty caddies, or when one of the disks will fail, which I hope won’t happen any soon.